


Geographical Distribution in Africa
Introduction
However growing potatoes in mixed cropping systems as currently practised by many small scale farmers where volunteers from previous crops are not weeded out has by now managed to spread serious seed borne plant diseases to most potato growing areas. This has resulted in declining yields and again undermined the possibility of good food security in These areas.
On-farm production of potato seed tubers by smallholder farmers in small seed-plots
a) Principle of seed plot system
b) Land requirement and site selection
In Kenya there is a very large commercial opportunity in the production of certified seed potatoes. The demand for and commercial price of clean potato seed tubers is far higher than potatoes for the food market. Mid 2010 it was established that Kenya only produces about 1% of the potato seeds needed every year by potato Farmers countrywide. Clean seed is the best start for a good potato crop yield as most potato farmers know or have discovered.
c) Choose your plot for potato seed production with care
- It should not have had any Irish potatoes, capsicums, eggplants (brinjals) and tomatoes grown in it for the last 5 years.
- Preferably it should have had a dense mat of grass growing on it for at least one year during the last 5 years.
- Other probable sites for seed plots include virgin land and land that has been under fallow for 2-3 seasons.
- It should not have been given agricultural lime for the last 5 years
- The plot should be located in full sunshine in highland areas, and in half shade (for example shaded half the day) in hotter areas.
- The seed plot should not be situated in low-lying or water-logged areas where run-off water flows into it.
- There should be a good supply of well composted farm yard manure applied just before planting the certified seed potato tubers. If the amount of manure is not very much, it should be applied in the trenches dug for planting tubers.
- If Lantana camara bushes grow in your neighbourhood it is very beneficial to also mix in leaves of lantana in the potato planting rows to repel insects.
d) Sources of seed tubers
e) Positive seed selection technique
- These pegged plants are considered to be positively selected seed potatoes. The removed diseased plants with bacterial wilt including their tubers should be put in a 1-metre deep pit and covered with clean soil or be burnt. Also wilt infected plants and tubers should not be put in compost heap.
- Harvest the pegged plants separately and first before the rest of the field to get seed tubers for the next planting. This procedure is in contrast with the usual farmer practice where all plants in the field are harvested together and seed is picked from the harvest for planting in the following season
Guide to knowing healthy and diseased potato plants
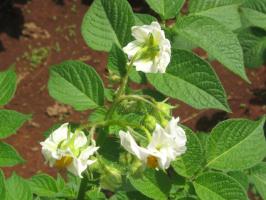
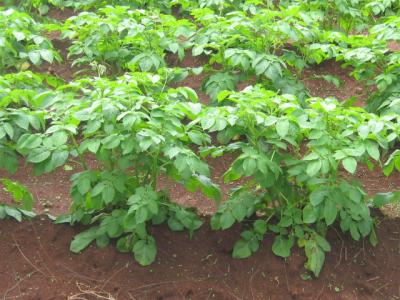
How a healthy plant looks
 |
 |
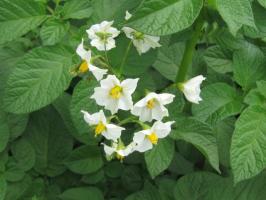
| Healthy Mavuno potato | Potato variety 'Asante' |
| © A.A. Seif | © A.A. Seif |
 |
 |
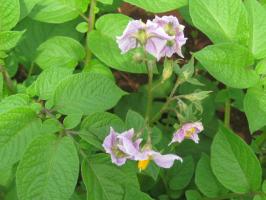
| Potato variety 'Tigoni' | Potato crop flowering |
| © A.A. Seif | © A.A. Seif |
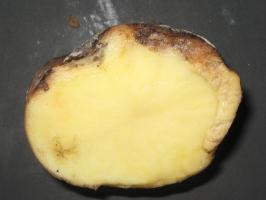
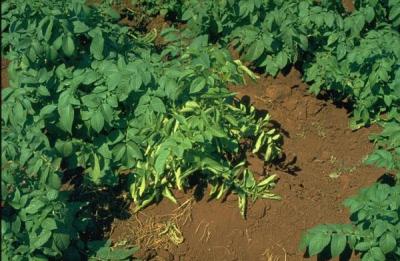
How a bacterial wilt infected plant looks
The first visible symptom of Bacterial wilt on foliage is a wilting of the leaves at the ends of the branches during the heat of the day with recovery at night. As the disease develops, a streaky brown discolouration of the stem may be observed on stems 2.5 cm or more above the soil line, and the leaves develop a bronze tint.
 |
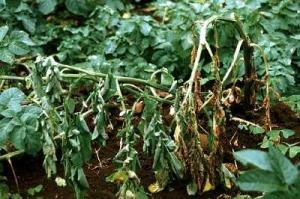 |
| Bacterial wilt (rotting of vascular ring) | Bacterial wilt symptoms on potato plants. |
|
© A.A. Seif
|
© Mauritius Sugar Industry Research Institute. Reproduced from the Crop Protection Compendium, 2004 Edition. © CAB International, Wallingford, UK, 2004 |
How a virus infected plant looks
 |
| Potato Leaf Roll Virus 1 |
|
© A. A. Seif |
Seed plot system
Land preparation, planting and crop management
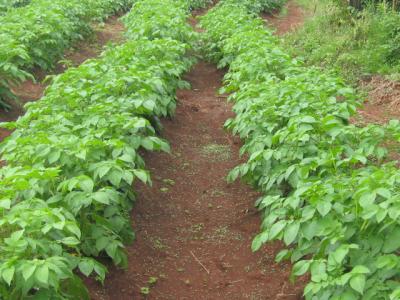 |
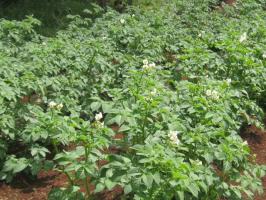
| Rows of potato mother plants widely spaced for production of basic seed |
| © A.A. Seif |
 |
| Potato mother plants widely spaced (1.5x0.60m) for production of basic seed |
| © A.A. Seif |
Harvesting, grading and storage
- Seed tubers must be unbruised measuring 2.5-5.5 cm in diameter. Larger tubers should be sold off as ware potatoes.
- Selected seed tubers should be stored in diffused light and ample aeration. Do not store seed tubers in dark stores used for ware potatoes.
- Store tubers of each variety separately. Do not store seed tubers in gunny bags.
- Spread the seed tubers thinly on the floor or in wooden crates.
- Cover with branches of Lantana camara.
- Farmers in Naivasha have discovered that storing seed potatoes under saw dust keeps away tuber moths and keep the potatoes seeds longer.
Usage of seed plot tubers
Seed plot protection
- Fence the seed plot area to restrict movement that can cause contamination.
- Plant maize around the seed plot as a border crop to minimize aphid infestation. Plant at least 4 rows of maize 2-3 weeks before seed potatoes.
- Clean and disinfect all tools, feet and shoes before entering the seed plot area.
- Use a household bleach (sodium hypchlorite) (e.g. JIK®) at the rate of 50 ml in 1 litre of water.
Information Source Links
- Anon. (2006). Select the best: Field guide for positive seed potato selection. CIP Sub-Saharan Office, Nairobi
- Gildemacher, P., P. Demo, P. Kinyae, M. Wakahiu, M. Nyongesa and T. Zscocke (2009). Select the best. Positive selection to improve farm saved seed potatoes. Farm field aid. 2nd. Edition. CIP & CTA. ISBN: 978-92-9060-362-7
- Kabira, J.N, M. Macharia, M.W. Karanja and L.M. Muriithi (2006). Potato Seed: How to grow and market healthy planting material. KARI Technical Note No. 20, April, 2006, Kenya Agricultural Research Institute
- Kinyua, Z.M and J.J. Smith (2007). Multiplication of disease-free seed potato in seed plots. KARI Advisory Bulletin, March 2007, Kenya Agricultural Research Institute
- Nyongesa, M., C. Lung'aho, C. Kinyae, P. Wakahiu, M. Karinga and J. Kabira (2008). Production of food (ware) potatoes. KARI information brochure series/35/2008, Kenya Agricultural Research Institute
- Nyongesa, M., C. Lung'aho, P. Wakahiu, J.N. Kabira, P. Gildemacher and G. Forbes (2008). Control of late blight on varieties Asante and Tigoni. Kenya Agricultural Research Institute/International Potato Centre, SSA, Nairobi